
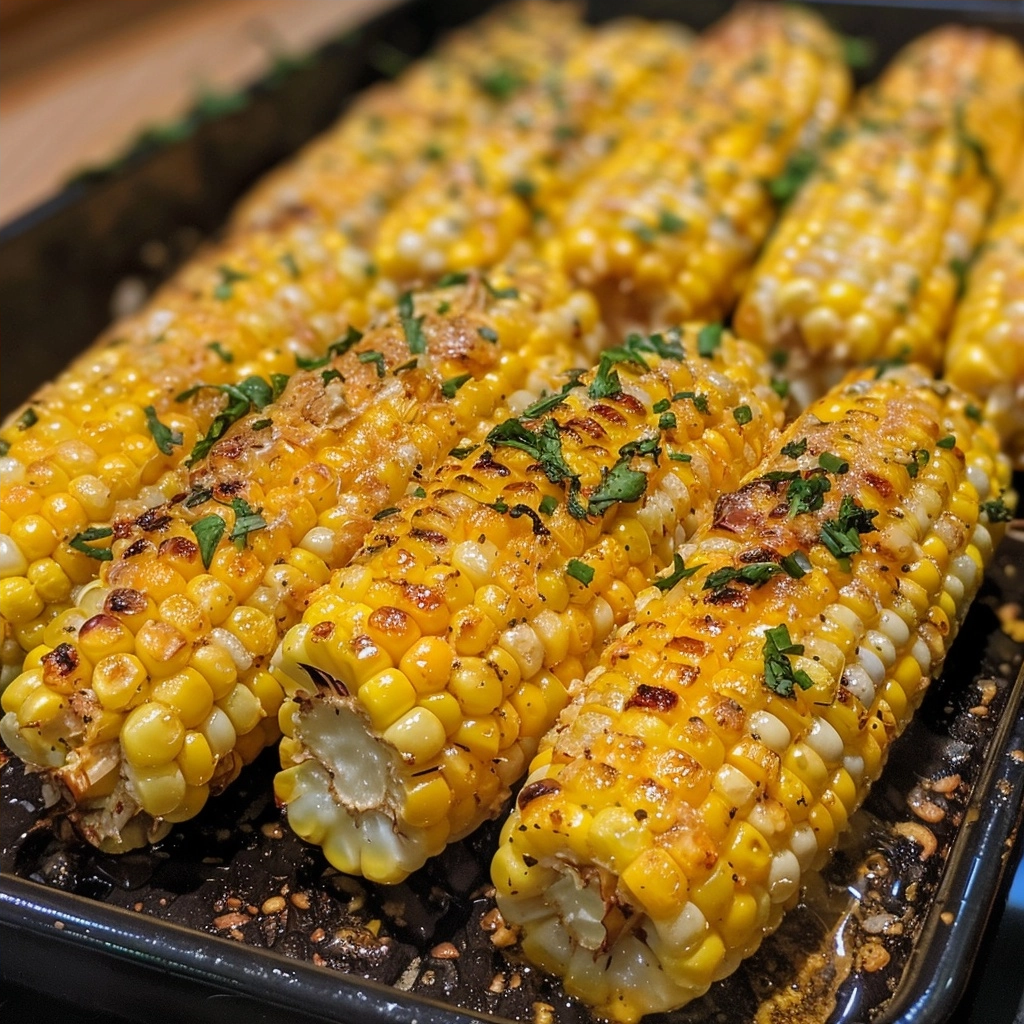
Honey butter corn recipe preparations create a golden, caramelized side dish featuring tender corn kernels tossed in a rich, sweet, and salty glaze. This versatile recipe pairs perfectly with grilled proteins or roasted vegetables during weeknight dinners. You achieve the ideal balance of creamy butter and natural corn sweetness with minimal effort and essential pantry staples.
| Prep Time | Cook Time | Total Time | Servings | Difficulty | Cuisine |
|---|---|---|---|---|---|
| 5 minutes | 10 minutes | 15 minutes | 4 servings | Easy | American |
Why This Recipe Works
This side dish succeeds because it highlights the natural sugars inside fresh corn kernels using the Maillard reaction. By sautéing the corn until lightly charred before adding the butter and honey, you develop a deep complexity that elevated canned or frozen corn instantly.
I developed this method after searching for a fast vegetable side that my family would actually request. The combination of heat management and high-quality ingredients ensures the glaze coats the kernels properly without becoming greasy or cloying. You will find that this dish fits perfectly into a busy meal plan because it utilizes standard pantry basics.
Ingredients
| Ingredient | Quantity | Notes |
|---|---|---|
| Frozen or Fresh Corn | 4 cups | Thaw frozen corn completely |
| Unsalted Butter | 4 tablespoons | Use high-fat European butter |
| Honey | 2 tablespoons | Local raw honey works best |
| Salt | 1/2 teaspoon | Kosher salt is preferred |
| Black Pepper | 1/4 teaspoon | Freshly cracked allows depth |
| Parsley | 1 tablespoon | Finely chopped for freshness |
Step-by-Step Instructions
Preparation and Cooking
- Heat a large skillet over medium-high heat for one minute to ensure even temperature distribution.
- Add two tablespoons of butter to the hot skillet until the foam subsides.
- Pour the corn into the skillet in a single, even layer for proper charring.
- Sauté the corn for five minutes without stirring to encourage deep golden browning on the kernels.
- Reduce the heat to medium and add the remaining butter along with the honey.
- Toss the corn continuously for three minutes until every kernel is coated in the glaze.
- Season the mixture with salt and pepper while stirring to combine the flavors.
- Remove the skillet from the heat immediately to prevent the honey sugars from burning.
- Garnish the dish with fresh parsley before transferring to a serving bowl for immediate consumption.
Chef Tips for Perfect Results
- Dry your corn thoroughly with paper towels if using frozen or canned varieties to ensure proper browning.
- Use a cast-iron skillet for superior heat retention, which creates the best caramelized texture on your corn kernels.
- Avoid overcrowding the pan, as this causes the corn to steam rather than sear properly.
- Finish the dish with a tiny squeeze of lemon juice if you desire a bright, acidic contrast to the rich butter.
- Keep the heat at medium after adding the honey to prevent the natural sugars from turning bitter.
Common Mistakes to Avoid
Overcooking the corn leads to a mushy texture that lacks the signature pop of the kernels. You should monitor the heat closely and cook only until the corn reaches a vibrant yellow hue. Using salted butter can result in an overly aggressive flavor profile; select unsalted butter and adjust the final seasoning individually. Adding the honey too early causes premature burning, creating a sticky mess that clings to your cookware surface. You can avoid this by adding the honey only during the final stage of the cooking process.
Variations and Substitutions
| Ingredient | Substitution | Impact on Flavor |
|---|---|---|
| Honey | Maple Syrup | Adds earthy, woody sweetness profile |
| Butter | Ghee | Creates a nuttier, more intense richness |
| Corn | Fresh Cob Kernels | Provides a brighter, crisper texture |
| Parsley | Cilantro | Introduces a fresh, citrusy herbal note |
Serving Suggestions and Pairings
This honey butter corn recipe serves as an excellent companion to barbecue chicken or baked fish fillets. It also provides a sweet contrast to spicy dishes like chili or blackened shrimp tacos. Serve it alongside roasted root vegetables during holiday gatherings or as a quick weekday side with a crisp green salad.
Storage and Reheating
| Method | Duration | Instructions |
|---|---|---|
| Refrigerator | 3-4 days | Store in an airtight container |
| Stovetop | 2-3 minutes | Reheat on low with a splash of water |
| Microwave | 1 minute | Heat on medium power covered |
Nutritional Information
Approximate values per serving:
| Nutrient | Amount |
|---|---|
| Calories | 185 kcal |
| Fat | 12g |
| Carbohydrates | 22g |
| Fiber | 2g |
| Sugar | 8g |
| Protein | 3g |
Frequently Asked Questions
Can I use canned corn instead of frozen?
Yes, canned corn works perfectly as long as you drain it thoroughly and pat it dry with a clean towel. Ensure you cook it slightly longer to remove excess moisture before adding the butter.
What is the best way to tell when the corn is done?
The corn is done when the kernels are tender and exhibit a sightly caramelized or golden exterior appearance. You should see them begin to glisten from the honey and butter emulsion when they reach peak quality.
How do I prevent the honey from burning in the pan?
You prevent burning by adding the honey after the corn has browned and reducing the heat to medium or medium-low. Actively tossing the corn ensures the glaze distributes evenly without sitting in one concentrated spot.
Can I make this dish a day in advance?
You can prepare this dish in advance, though the texture is freshest when cooked right before serving. Simply store the mixture in the refrigerator and gently reheat it on the stovetop with a small amount of extra butter.
Does this recipe work well for large crowds?
This recipe scales easily by doubling or tripling the ingredient amounts within a large stockpot or catering-sized skillet. Ensure you allow enough surface area in your cookware to maintain the browning process for consistent results.
Mastering this honey butter corn recipe allows you to transform simple vegetables into a memorable, crowd-pleasing addition to any meal. Focus on high heat for the initial sear and low heat for the final glaze to ensure the perfect, slightly sweet outcome. Experiment with savory herbs to customize this side dish according to your preference. Your family will certainly appreciate the deep, caramelized notes that define this classic preparation.
PrintHoney Butter Corn
This Honey Butter Corn is a golden, caramelized side dish that highlights the natural sweetness of corn kernels tossed in a rich, velvety glaze. Perfectly balanced between sweet and savory, this easy-to-make recipe elevates simple corn into a sophisticated side dish that pairs beautifully with grilled proteins or roasted vegetables. It is a family-favorite vegetable dish that comes together in just minutes using basic pantry ingredients, making it an ideal choice for busy weeknight dinners.
- Prep Time: 5
- Cook Time: 10
- Total Time: 15
- Yield: 4 servings 1x
- Category: lunch
- Method: Sauté
- Cuisine: American
- Diet: Vegetarian
Ingredients
4 cups Frozen or Fresh Corn (thawed if frozen)
4 tablespoons Unsalted Butter
2 tablespoons Honey
1/2 teaspoon Kosher salt
1/4 teaspoon Freshly cracked black pepper
1 tablespoon Fresh parsley, finely chopped
Instructions
Heat a large skillet over medium-high heat for one minute.
Add two tablespoons of butter to the skillet until the foam subsides.
Pour the corn into the skillet in a single layer.
Sauté the corn for five minutes without stirring to achieve golden charring.
Reduce heat to medium and add the remaining two tablespoons of butter and the honey.
Toss the corn continuously for three minutes until the kernels are well glazed.
Add the salt and pepper, stirring to combine.
Remove from heat immediately to avoid burning the honey.
Garnish with fresh parsley before serving.
Notes
Use high-fat European butter for a richer flavor profile. Ensure the corn is thoroughly dried if using frozen corn to prevent steaming rather than browning. You can store leftovers in an airtight container for up to 3 days in the refrigerator.
Nutrition
- Serving Size: 1 cup
- Calories: 210
- Sugar: 12g
- Sodium: 300mg
- Fat: 11g
- Saturated Fat: 7g
- Carbohydrates: 28g
- Fiber: 3g
- Protein: 4g
- Cholesterol: 30mg